Set up your racks
Choose the number of rows and columns, then label the positions to match your rack. Add more racks or a wine fridge within the same cellar, and mark any spaces you don’t use as inactive.
Recreate your racks in SmartCellar and give each bottle its own position. When it’s time to open that Saint-Émilion, you’ll know exactly where to find it.
One cellar and up to 50 bottles, free. No card required.
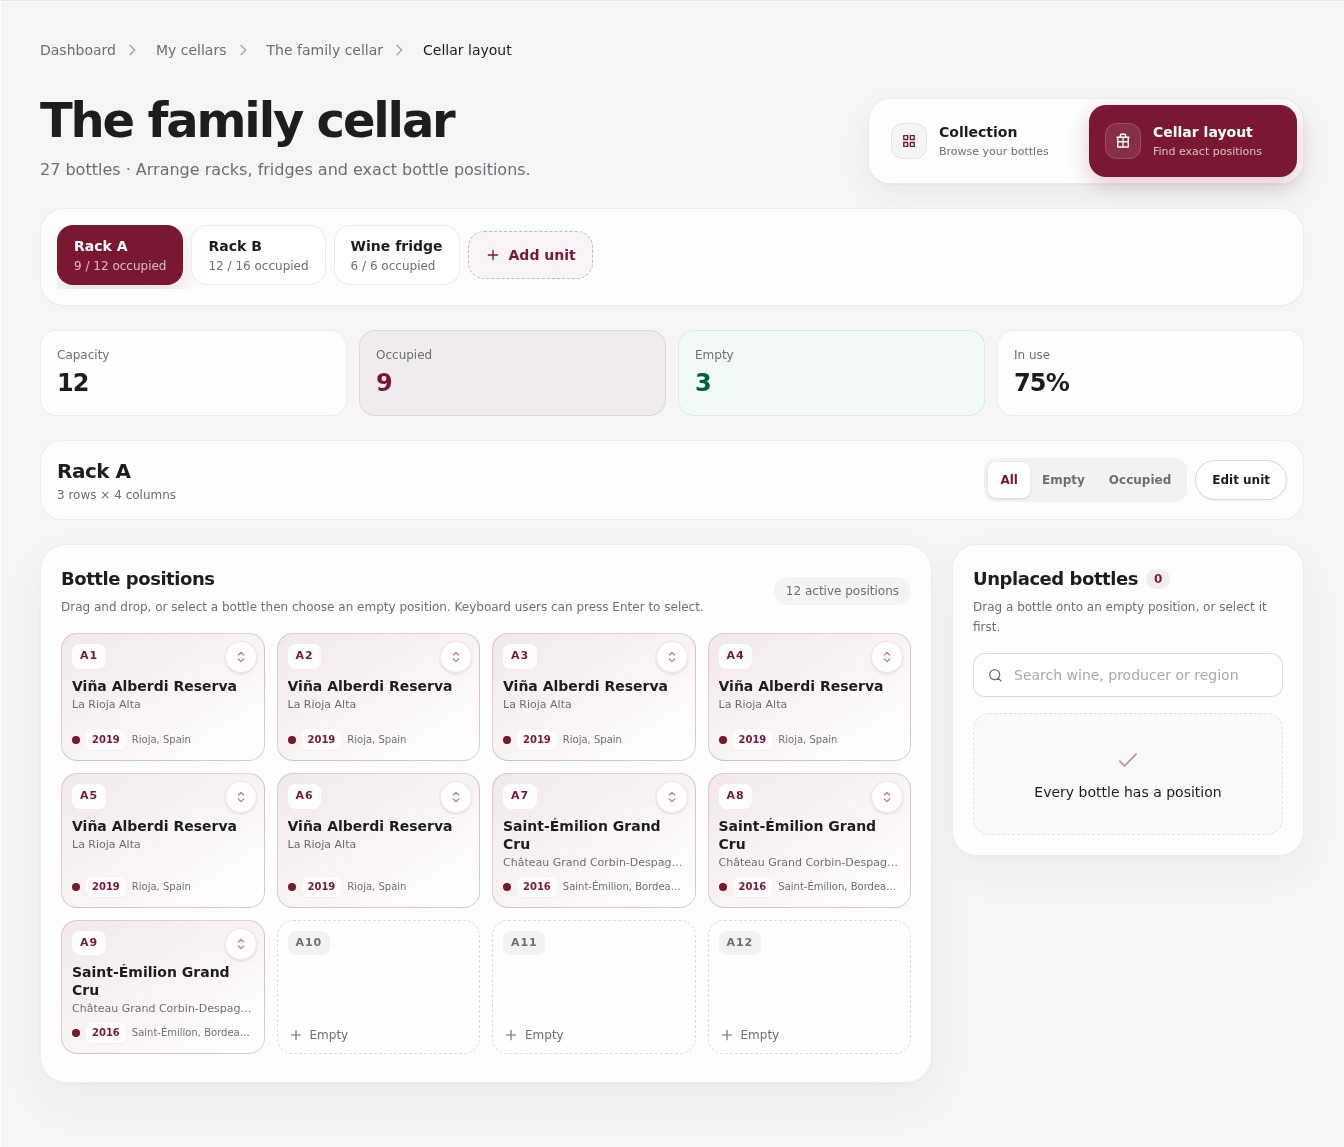
Sample layout: six bottles of Viña Alberdi and three of Saint-Émilion.
Rack A: 9 bottles. Position A7 holds Saint-Émilion 2016.
Wine fridge: 0 bottles.
Total: 9 bottles.
Illustrative move. In your cellar layout, select a bottle and its new position.
Choose the number of rows and columns, then label the positions to match your rack. Add more racks or a wine fridge within the same cellar, and mark any spaces you don’t use as inactive.
Give each bottle its own place on the layout. Keep a case together, or split it between a rack and the fridge. You can drag a bottle into an empty space, or select the bottle and then its position.
See how many spaces are occupied and how many are free in each rack. Filter the layout to show empty positions when you’re finding room for a delivery.
When you move a bottle, update its position in the layout. Moving it from a rack to the fridge keeps the bottle count the same, with its purchase details and your tasting notes still alongside the wine.
One cellar and up to 50 bottles, free. No card required.